Showing posts with label dresses. Show all posts

Tuesday, April 29, 2014

Finished project: Colette 1028 - Moneta dress

I finished my dress over a week ago, but now I finally have photos of my Colette Moneta dress!

Colette Moneta
I took the day off from work yesterday, and we took a family trip up to the Tulip Festival in Skagit County. I'd like to thank my husband for these lovely shots!

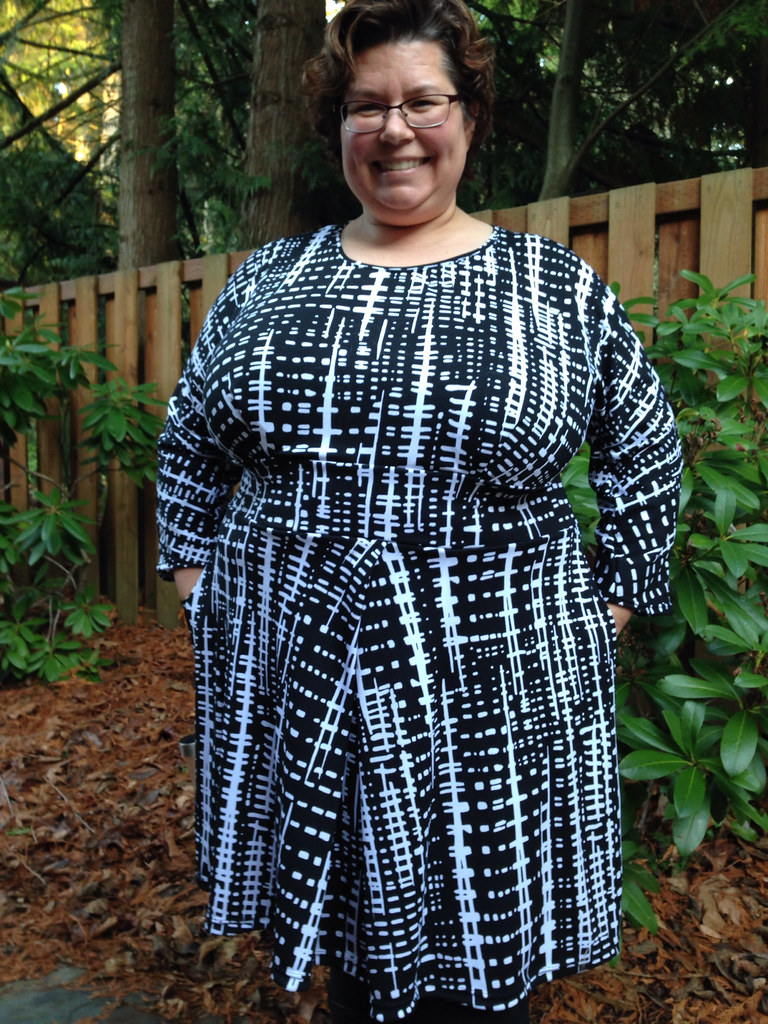
I was doing a total Mom-on-the-go thing with this dress yesterday; I think that Stacy and Clinton would have been proud. (Note that I paired the dress with leggings and boots because the weather was actually quite cool and overcast when we left the house--not even the forecast from Weather Underground had predicted what beautiful spring weather the afternoon would bring.)

As has been the case with all of the Monetas that we've seen so far, this is a very wearable dress that appears to be flattering on all figure types.  For sizing, I sewed a 2X, which is squarely where my bust, waist, and hip measurements all fall on the size chart for this pattern. That's even a 2X at the neckline/shoulder, and you can see that the shoulder seam sits right where it's supposed to. (Normally, I would have started with an XL and graded out to a 2X at the armscye on a pattern like this, but to be completely honest, I just flat-out forgot to do that. Doesn't matter since the smaller size through the neck/shoulders wasn't needed anyway.) I compared the bodice to my TNT t-shirt and was a little nervous about the negative ease at the bust and waist and added a little (in the form of cutting a larger seam allowance) to the side seams there, so this dress is probably really about a 2.25X at those measurements, but I don't think I really needed to do that addition, upon seeing the finished dress.

I also scooped out the neckline area (lowering it by ~1.5") and did a self fabric band style of binding, rather than hemming the neckline. I was nervous about the original neckline giving me a uniboob effect, since high necklines are not usually a friend of the large busted.

The only other change I made was to add about an inch of length over the bust. I did this by taking the bodice front pattern piece, marking 1" below the CF of the bottom of the piece, then blending the curve from the pattern piece bottom. If this is confusing, I can post a picture of the pattern piece if anyone is interested.

Colette Moneta - closer shot
(At my elbow is my always-with-me-on-outings HotPatterns Mommy Tote.)

For fabric, I used ~2.5 yards of a poly lycra jersey from Gorgeous Fabrics that I've had in my stash for a few years. I remember when Ann originally posted this fabric, I had to have it, but I made myself wait until it was on sale, and then it sat in my stash, forgotten. I very recently rediscovered it when I was unpacking a tub of fabric from our move and decided that it needed to become a Moneta. I love polka dots, and I love that the subdued neutral colors of these dots lets me wear them without feeling like I'm wearing something too twee.

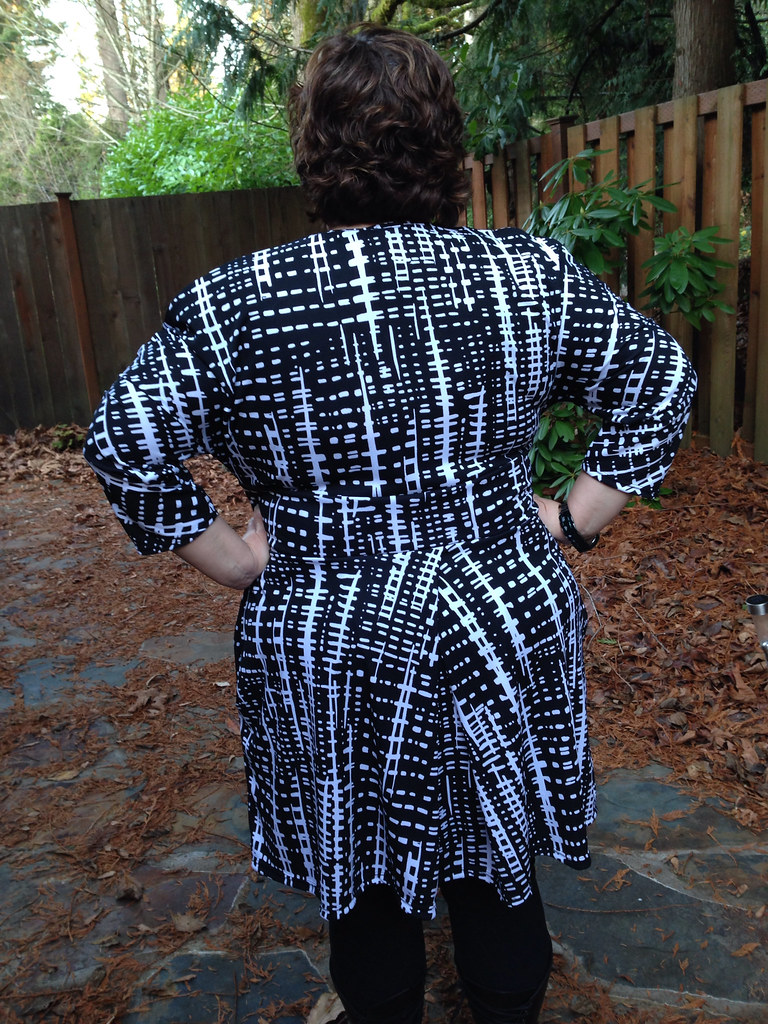
Apologies for not getting a decent back view--in the only one we took, I'm wearing my jacket:

Colette Moneta rear view
I will definitely be making more of these dresses. I whipped this one out in a few hours, and as others have mentioned, this is a very easy, instant-gratification type of pattern. I definitely want to make at least one solid-colored version and would love another one in a cotton jersey print, but I haven't chosen any fabric for additional versions yet.

I know that this is a really basic dress, but I'm really happy with it, and sometimes you need that type of project. I also think that it's great that Colette included such detailed instructions for knit newbies AND also expanded their size range to include plus sizes. No more grading up or grading-up-via-FBA for many of us!


Tuesday, December 10, 2013

Finished projects: Red Velvet dress by Cake Patterns

I finished not one, but two, Red Velvet dresses a few weeks ago, but we only got around to photographing the second one this past Sunday. (As I mentioned in several earlier posts, I took part in the Red Velvet 30-minutes-a-day sewalong.) I could have blogged these separately, but since I chose to try each of the two pleating methods, I wanted to show them side-by-side for the sake of comparison.


Note that I made the following pattern alterations to both versions of this dress:
  • 3" Deep Bust Adjustment (DBA) to add length only over the bust
  • Lengthened sleeves to 3/4 length for the sake of practicality
  • Shortened midriff band by 1.5" (I felt that the midriff band on my Tiramisu dress was too tall; the Red Velvet midriff is a similar height.)
  • Shortened skirt by 2"
  • Trimmed neckline by 1/2" depth to create a more open neckline
  • Opted to self-fabric bind the neckline rather than to use the included facing
  • Converted bust release pleats to darts (I didn't care for the look of the release pleats on some of the larger busted sewists who made the dress before me. Those who used darts had less of a "Look at my nipples!" effect.)
  • Added the side seam pockets from my Tiramisu dress
  • Opted not to use the hidden "invisible zipper" pocket
First up is the first version that I sewed, using a black-and-white ITY jersey that I purchased a while back from Fashionista Fabrics:


For this version, I used the scissor pleat option on the skirt, in both the front and back view. I remember when this pattern came out, I saw a lot of discussion online debating the wisdom of placing a giant pleat over our butts, given that most of us want to minimize bulk there. I proceeded with cautious optimism in this area, after having seen a few other women sew up the Red Velvet dress before I sewed mine up. My observation was that the pleat seemed to work okay if you used a light enough weight fabric. Dresses made up in, say, an ITY knit looked okay; dresses made up in a doubleknit generally probably would have looked better without the pleat/bulk.

Here's the pleat in the back. I don't think it's particularly noticeable, given the print of my fabric:


With my alterations, I was very happy with how my dress turned out. I can wear it to work without feeling like I need to wear a jacket or sweater over it or wearing a cami under it. Note: I feel that ITY knit is the perfect fabric for this dress. It has the perfect amount of body, stability, and drapiness without being too bulky.

For my second version, I used what was also labeled an ITY knit on the bolt. I bought this striped fabric at the Mill End Store on our trip to Portland, OR in October. Note that this fabric was a little bit thinner, WAY more slippery, and WAY more drapey than any other ITY knit that I've worked with. To be honest, it was a pain to work with. The midriff band is a black ITY jersey that I've had in my stash.

With this version, I thought that the "boxy pleat" option on the skirt might be fun with the stripes. here's the front of the dress:


Here's the back of the dress. I do think that the scissor pleat is more flattering on larger backsides like mine--it's more subtle:


 Overall, I'm happy with my dresses. I feel like I got two very wearable dresses out of the sewalong/project. I like the black and white one a little more, but the striped one is still cute and fun and has a totally different vibe. I could see myself make a third version of this dress if I am struck with fabric inspiration.

Thursday, November 21, 2013

Cake Red Velvet sew-along: Days 3-8

The Cake Red Velvet sewalong is going well. Honestly, I thought that participating in a sewalong would give me more material to blog, but with everything being broken down into 30-minute bite size "chunks", I don't really feel like I have a whole lot to say. The dress is almost finished now, and based on my basting of the bodice side seams to check the fit, I think it's looking pretty good unless everything goes to hell once I attach the skirt.

This has been my first formal sewalong that I've actually participated in (as opposed to signing up, getting distracted by life, and completely flaking on). It's been an eye-opening experience for me in a number of ways:
  • Despite having a toddler and a husband, I absolutely can find a way to sew for 30 minutes/day on most days. On some days, I've had to get up for work 30 minutes earlier than usual to get that sewing time in, but I've made it a priority to squeeze that time in.
  • When you do consistently sew for 30 minutes/day, you can get a lot done. In two weeks, I've completed or nearly completed four garments:
    • A sleep t-shirt for my husband (a Simplicity PJ pattern that I'll be reviewing)
    •  Two pairs of Espresso leggings (not yet reviewed): one "test" fair in leftover fabric and one (nearly completed) pair in good, activewear fabric
    • My first RedVelvet dress (almost complete)
  • Flickr photostreams can help you make good decisions with fit and design changes. For example, the RedVelvet bodice contains a release pleat for the bust. I noticed in the Flickr photostream, as fit photos poured in, that I didn't care for how the release pleat looked on many of the fuller busted participants. Solution? As someone else suggested, I sewed the pleat into a dart. I think I'm much happier with how this looks than I would have been with the release pleat. I don't think I would have caught this had I not participated in the sewalong.
  • Fitting doesn't seem like such a horrendous chore when you're not trying to cram a ton of alterations into a single weekend afternoon. 
If you've never participated in a 30-minute-a-day sewalong, here's a quick rundown of what we've done each day. I'm including the "daily point" shot description for each day, which is the picture that we upload to flickr each day so that our "house" can be awarded a progress point in the competition.
  1. Gather materials (fabric, pattern, thread, scissors, etc). Point shot is a picture of your fabric, etc, in a box.
  2. Trace pattern (optional). Cut out pattern and make alterations. Cut your fabric. Note: This one took me considerably longer than 30 minutes, and I didn't even trace my pattern. Point shot: Your cut pattern/fabric pieces.
  3. Stabilize bodice shoulder seams. Point shot is your stabilized seams.
  4. Sew your shoulder seams. Point shot is of the sewn & finished shoulder seams.
  5. Complete and topstitch your neckline (facing or binding). Point shot is of your topstitching setup.
  6. Sew bust pleats (or darts) and hem sleeves. Point shot is your hemmed sleeves.
  7. Baste your bodice seams to check the fit. Point shot is of your iron.
  8. Sew your skirt pleats. Point shot is of your basted pleats.
  9. Sew your pockets and connect the bodice/midriff/skirt sections. Point shot is of your pocket.
  10. Day 10 hasn't been announced yet, but I would assume that it will be to sew up your side seams and hem your dress, which completes the project. I would think/home that the point shot will be of the finished dress, but I guess we will see.
I sewed/basted the skirt pleats last night. I was afraid of the scissor pleat on my backside from the line drawing, but I think it looks fine on the "real world" models that I've seen on flickr. It drapes nicely (in the right fabric) and doesn't appear to add much bulk. My pleated skirt sections:
I might very well try to finish the dress tonight. At the very least, I'll finish either the dress or my second pair of Espressos, and then I'll actually have a finished project to talk about!

Sunday, June 17, 2007

Summer of the dress

They're everywhere this summer: dresses. In every women's clothing store, Old Navy ads, and pretty much every fashion article you see, the big "must have" right now is a pretty, feminine summer dress.

I love dresses, but most dresses don't love me. After having lost nearly 75lbs over the past year and a half, I want to be able to wear the new summer dresses. However, I'm short (5'2"), and have a very large chest, and trying to find a dress that fits me properly and is flattering is nearly impossible. Everything in Ann Taylor Loft currently has tiny little straps and really wouldn't look good on anyone with a larger bust than a B-cup. I'm SOL there right now.

A dress needs the following characteristics to make a dress wearable or preferably flattering for me:
  • Straps. Real straps--not little tie things. I need straps that I can wear a real bra under.
  • Can't be too low cut. Not everyone needs a free show, and I spill out of a lot of the current wrap-style and kimono dresses. Granted I could layer with a tank top under there, and some dresses are intended for this, but it's still frustrating.
  • Fitted waist or some sort of tie belt. Because my chest is the biggest part of me, most of the time, for me to get clothes that fit in the chest, they're way too big everywhere else. Yes, I could get things tailored, but it would be nice to occasionally find something that fits without needing it.
The frustrating thing is that now that I work from home most of the time, the freezing office air conditioning is no longer an issue for me, and I'd love to be living in sundresses this summer.

Over the next few weeks, I'll be making a series of posts highlighting some of my clothing sources that I've found that work for us gals with large chests, but who aren't necessarily large anywhere else. Enjoy!