Wednesday, December 18, 2013

Upcoming projects: My winter coat

I am going to hold myself to planning out my seasonal sewing by quarter this year (see my Thinking ahead post from November).

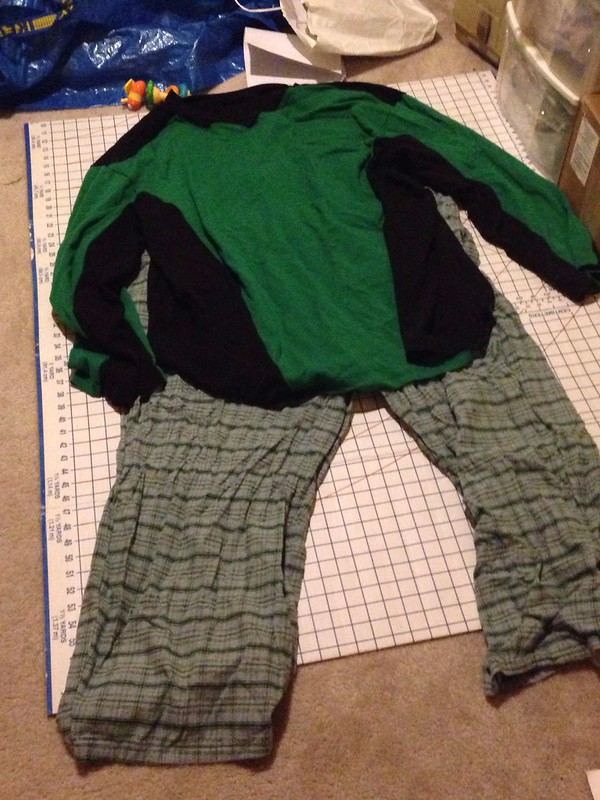
Right now, I'm finishing up a set of pajamas for my daughter that I hope/expect to be able to give her for Christmas. I've had the fabric for a few months--it's a Yo Gabba Gabba flannel, and she gets excited every time that she's in the sewing room and sees it. She starts pointing to the characters and calling them out. "Muno!" "Toodie!". It's adorable. I am really looking forward to having her unwrap the pajamas and seeing her Gabba fabric in pajama form, which she can wear. We'll be spending the holidays at my parents' house in San Diego, so these pajamas will be my final completed project for 2013. Once we return to Seattle, my sewing calendar will be wide open.

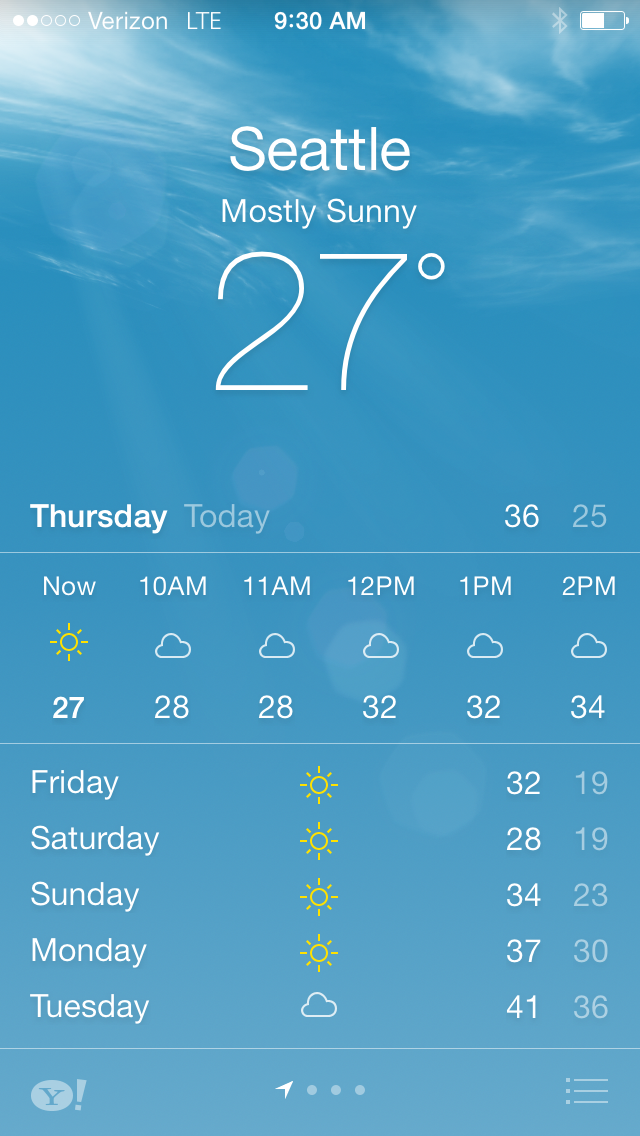
I need a coat. In San Diego, I rarely wore anything warmer than an unlined jacket. I do own a coat--one that I bought on clearance at Old Navy 6 or 6 years ago, and it's pretty warm and flattering, but the style is very dated now. I am going to sew a coat (a phrase that one year ago, I'd never thought I'd type).

My pick for a coat pattern: HotPatterns Deco-Vibe Retro-Fabulous coat


When this pattern was released a year or so ago, I thought that it was a really cool looking coat, but I didn't purchase it, given that I didn't think it would get much wear in San Diego. However, when we moved to Seattle, I think it was one of the first patterns that I bought.

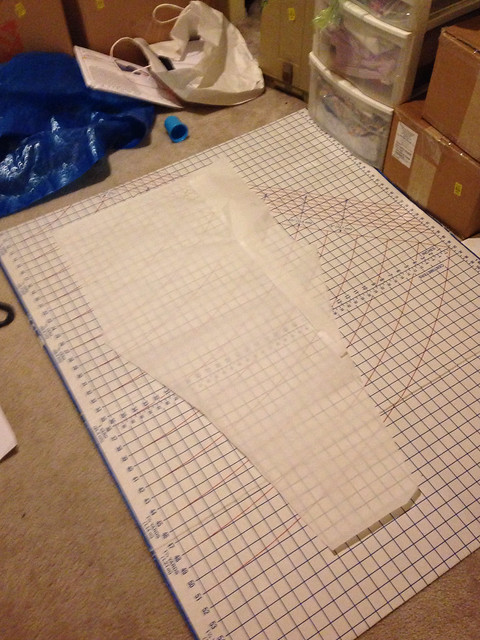
I already have purchased fabric for the coat: red wool for the shell, and a printed charmeuse for the lining. I will be interlining it, too--my first time interlining anything. I am simultaneously really excited about  and feeling nervous about this project.

I haven't seen this coat blogged or reviewed yet, so I will be a bit of a guinea pig in that department. Luckily, the pattern appears to be easy fitting, which is what I want so that I can wear it over a sweater or multiple layers. I'd much rather spend my time on the detail work of the coat than haggling with fit issues.

Tuesday, December 10, 2013

Finished projects: Red Velvet dress by Cake Patterns

I finished not one, but two, Red Velvet dresses a few weeks ago, but we only got around to photographing the second one this past Sunday. (As I mentioned in several earlier posts, I took part in the Red Velvet 30-minutes-a-day sewalong.) I could have blogged these separately, but since I chose to try each of the two pleating methods, I wanted to show them side-by-side for the sake of comparison.


Note that I made the following pattern alterations to both versions of this dress:
  • 3" Deep Bust Adjustment (DBA) to add length only over the bust
  • Lengthened sleeves to 3/4 length for the sake of practicality
  • Shortened midriff band by 1.5" (I felt that the midriff band on my Tiramisu dress was too tall; the Red Velvet midriff is a similar height.)
  • Shortened skirt by 2"
  • Trimmed neckline by 1/2" depth to create a more open neckline
  • Opted to self-fabric bind the neckline rather than to use the included facing
  • Converted bust release pleats to darts (I didn't care for the look of the release pleats on some of the larger busted sewists who made the dress before me. Those who used darts had less of a "Look at my nipples!" effect.)
  • Added the side seam pockets from my Tiramisu dress
  • Opted not to use the hidden "invisible zipper" pocket
First up is the first version that I sewed, using a black-and-white ITY jersey that I purchased a while back from Fashionista Fabrics:


For this version, I used the scissor pleat option on the skirt, in both the front and back view. I remember when this pattern came out, I saw a lot of discussion online debating the wisdom of placing a giant pleat over our butts, given that most of us want to minimize bulk there. I proceeded with cautious optimism in this area, after having seen a few other women sew up the Red Velvet dress before I sewed mine up. My observation was that the pleat seemed to work okay if you used a light enough weight fabric. Dresses made up in, say, an ITY knit looked okay; dresses made up in a doubleknit generally probably would have looked better without the pleat/bulk.

Here's the pleat in the back. I don't think it's particularly noticeable, given the print of my fabric:


With my alterations, I was very happy with how my dress turned out. I can wear it to work without feeling like I need to wear a jacket or sweater over it or wearing a cami under it. Note: I feel that ITY knit is the perfect fabric for this dress. It has the perfect amount of body, stability, and drapiness without being too bulky.

For my second version, I used what was also labeled an ITY knit on the bolt. I bought this striped fabric at the Mill End Store on our trip to Portland, OR in October. Note that this fabric was a little bit thinner, WAY more slippery, and WAY more drapey than any other ITY knit that I've worked with. To be honest, it was a pain to work with. The midriff band is a black ITY jersey that I've had in my stash.

With this version, I thought that the "boxy pleat" option on the skirt might be fun with the stripes. here's the front of the dress:


Here's the back of the dress. I do think that the scissor pleat is more flattering on larger backsides like mine--it's more subtle:


 Overall, I'm happy with my dresses. I feel like I got two very wearable dresses out of the sewalong/project. I like the black and white one a little more, but the striped one is still cute and fun and has a totally different vibe. I could see myself make a third version of this dress if I am struck with fabric inspiration.

Monday, December 9, 2013

Yea or Nay: Inifinity scarves for the short, large-busted woman?

I never had to wear scarves when I lived in San Diego, but here in Seattle, they've pretty much been a necessity for being comfortable outside when the temperature drops below 45 degrees.

I know that the current fashion is to wear infinity scarves, which are a loop of fabric that you drape around your neck 2 or 3 times. I sewed one of these a few years ago, but never ended up wearing it much. I felt like I had a pool of fabric sitting on my Very Large Bust. Having a short neck didn't help things.

Infinity scarf (Nordstrom's)

Since moving, I've been sticking with a traditional scarf, looped once around my neck and letting the ends hang down. I might be deluding myself, but I like to think that the ends hanging down helps create vertical lines down the front of my body. In theory, this should have a lengthening effect on 5'2" me.

"Traditional" scarf (Nordstrom's)

What's your take? I'm thinking that the infinity scarf is a trend that I should just sit out, but maybe you're a full-busted woman yourself and you've found a way to style these where you don't feel like you're adding unnecessary bulk to your chest. Thoughts?

Thursday, December 5, 2013

Winter is here


Because "winter is here" is so much more original than "winter is coming" at this point, right?

Self-directed snark aside, I am experiencing my first "real" winter here in Seattle. I was actually born in Chicago, but we moved to San Diego when I was four years old. Since then, I've lived my entire life in the state of California (bouncing a couple of times between San Diego and the Bay Area). You just flat-out don't see temperatures of "27" in most parts of San Diego, let alone have days with high temperatures of 36. I see an upcoming low temp of "19" degrees Fahrenheit. I don't think I've ever actually been outside in 19 degree weather. I have no idea what that feels like.

When we told people that we were going to be moving to Seattle, the general consensus was "It's so rainy up there!" said to us with a tone indicating that we might melt from a little moisture. The rain really hasn't been a big deal; when it rains, it's usually overnight or in the early morning. We do have a fair number of overcast days up here. I've been told that we're having a dry fall, so maybe I haven't experienced the "real" rain yet.

The cold, on the other hand, is much greater than I expected. I'm not complaining about it--it's like a novelty to us so far. "OMG! So this is what 27 degrees feels like!" We haven't had any snow yet, but I've been told that the community that we live in does typically get a few inches of snow per year. Up here, people aren't used to snow and apparently, all hell breaks loose when it does snow.

Things that I've learned about cold weather in the past few weeks:
  • Scarves: They're not just fashion accessories!
  • An unlined/denim jacket does not cut it for warmth below 45 degrees.
  • I never thought I'd write this, but I really want to make a coat. A lined and interlined coat. (Yes, I have a pattern, fabric, etc.)
  • If you leave your car sitting outside at a Park and Ride all day in 30-something degree weather, you'll need to sit in your car with the engine running for 10 minutes while your defroster de-ices your windows enough to actually drive home.
Also, water freezes when it's this cold! Really, like puddles and stuff. Check out this "puddle" in a parking lot that I walk through to get to my office in the mornings:


That's ice! A squirrel could ice skate on that puddle! Can you tell that this is all still hugely entertaining to us? I'm probably going to explode with excitement the first time that I see snowflakes.

Oh, to be in your late 30's and experience winter weather for the first time...


Tuesday, December 3, 2013

Finished Project: Simplicity 1505 Big and Tall Men & Husky Boys' Pajamas

Given the lack of men's patterns in general, and the nearly complete absence of any patterns for a man who wears larger than a 2X, I was really excited to see Simplicity come out with a new Big and Tall men's pajama pattern in their most recent collection (October 2013).

Not only do the men's sizes run from 1XL-5XL, the pattern actually uses the pieced/colorblock trend that we've been seeing for the past few years. And a v-neck! Imagine that, a Big and Tall pattern that's reasonably fashionable!


The pattern includes both the men's and boys' pattern pieces with views for pants or shorts. You can't really see it in the line drawing, but the pants/shorts have inseam pockets--a bonus when your husband never wants to be too far away from his phone.

My husband desperately needed new pajamas, since he'd pretty much destroyed the set that I made him last year (he's rough on clothes). For the pants, I used cotton flannel that I'd purchased from Fabric Mart's $3/yard sale last winter. For the shirt, I used coordinating cotton interlock that I'd had in my stash for years that I'd bought at fabric.com. (The interlock was purchased before I'd figured out how important lycra/recovery is in knit tops...but for a set of pajamas, I figured it really didn't matter.)

I actually finished these a couple of weeks ago (grabbing a few minutes here and there while working on my Red Velvet dresses). Here are the finished pajamas:


Sizing-wise, the sizes seem to run very true to RTW. I chose my husband's RTW sizes for both the pants and shirt, and they both have the roomy (but not huge) fit that most of us like to have in our pajamas. The pattern went together well, and other than a few quibbles that I had with the order of construction (repeat after me: It's easier to sew in-the-flat than in-the-round for many things...), the instructions were fine. Note: My husband is 6'2" (he has a VERY long torso), and I did not need to add any length to the shirt. The only other time that I haven't had to add length to a shirt of his was when I made up the now-out-of-print Simplicity 4957: Big and Tall Men's shirt for him.

I'm really happy that Simplicity included this pattern in their last release. Since they sunsetted the old 4975 shirt pattern, I've been hoping that they'd come out with an updated men's shirt. These pajamas might not be that shirt, but they are a nice option if you are a Big and Tall man or have a larger man in your life. It's really nice to be able to sew something right out of the envelope for my husband without having to grade up multiple sizes. Outside of the Islander patterns and the occasional McCall's that run up to an XXXL, I'm not aware of any other sewing patterns for men that go past an XXL. I read a lot of valid complaints from plus sized women about the lack of sewing pattern options out there, but larger guys have it even worse in that department.

Monday, November 25, 2013

Completed project: Espresso leggings

Let me start this post off with a rant...  In the sewing blogosphere, I've seen a lot of sewists refer to a finished garment as a "make". I'm guessing that this is supposed to be whimsical or cutesy or something? This term is like a nails on a chalkboard to me--I cringe every time that I read it.  (No offense to anyone who loves to use this term, of course.) The inner grammar policewoman in me can't help but scream, "make" is a verb, not a noun. You "make" a skirt; a skirt is not a "make". Okay, I'll step down off of my soapbox now and tell you a bit about my latest "make", er, finished project.

Test pair of leggings - gray mystery fabric
I finished my first "good" pair of Espresso leggings from Cake patterns. In a previous post, I described how to use the template included in the pattern to draft your pattern piece. After drafting, I was able to cut and sew up my first "test" pair in about 40-45 minutes. For the test pair, I used a piece of heathered gray jersey that had been sitting in my stash for years. This fabric was leftover from another project and probably didn't have the ideal amount of stretch for this pattern (not much lycra and little to no vertical stretch).

In retrospect, this wasn't the best fabric choice for a test pair of leggings. I chose it because I wanted a pair of leggings in a dark charcoal gray color, and the fabric itself is very soft. I think that this pattern (and leggings in general) work better when you have a generous amount of lycra in the fabric mix.

I wore my test pair for a day and decided that the front rise was too high (1"), back rise was too short (1.5"), and that I needed more room in the calves, so I curved that outward by 1/2" on each side. I applied these changes to my pattern piece. Here is the original piece vs. the altered piece:

original pattern piece
altered pattern piece
For the second pair, I used a really awesome textured "active wear knit" that I purchased from Rose City Textiles when we visited Portland in October:
kitty photo bomb!

The fit is better with the second pair, but since the second fabric has more vertical stretch, I should have removed some length in some places (the front rise is still too long with these). I love this fabric, though, and learned that I probably want to stick to activewear knits (or at least knits with a lot of lycra) for future Espresso versions. (I do have a lovely piece of chocolate brown knit from the same visit to Rose City Textiles that will be used for another pair of leggings.)

While I will always be wearing these under a dress or long tunic, I'm posting pictures of the fit for the curious. Keep in mind that I'm only 5'2" and usually wear a size 18 in pants in RTW:

Espresso leggings - fit in front
Espresso leggings - fit in back
Overall, I'm very happy with this pattern--it was well worth the $8 or so that I paid when pre-ordering the pattern. These only take about 40 minutes to sew up, so you could conceivably make a pair of custom leggings to wear under every dress or skirt that you sew without adding much total time to your project.

Friday, November 22, 2013

Almost there!

Just need to sew up the side seams and hem the skirt!


Thursday, November 21, 2013

Cake Red Velvet sew-along: Days 3-8

The Cake Red Velvet sewalong is going well. Honestly, I thought that participating in a sewalong would give me more material to blog, but with everything being broken down into 30-minute bite size "chunks", I don't really feel like I have a whole lot to say. The dress is almost finished now, and based on my basting of the bodice side seams to check the fit, I think it's looking pretty good unless everything goes to hell once I attach the skirt.

This has been my first formal sewalong that I've actually participated in (as opposed to signing up, getting distracted by life, and completely flaking on). It's been an eye-opening experience for me in a number of ways:
  • Despite having a toddler and a husband, I absolutely can find a way to sew for 30 minutes/day on most days. On some days, I've had to get up for work 30 minutes earlier than usual to get that sewing time in, but I've made it a priority to squeeze that time in.
  • When you do consistently sew for 30 minutes/day, you can get a lot done. In two weeks, I've completed or nearly completed four garments:
    • A sleep t-shirt for my husband (a Simplicity PJ pattern that I'll be reviewing)
    •  Two pairs of Espresso leggings (not yet reviewed): one "test" fair in leftover fabric and one (nearly completed) pair in good, activewear fabric
    • My first RedVelvet dress (almost complete)
  • Flickr photostreams can help you make good decisions with fit and design changes. For example, the RedVelvet bodice contains a release pleat for the bust. I noticed in the Flickr photostream, as fit photos poured in, that I didn't care for how the release pleat looked on many of the fuller busted participants. Solution? As someone else suggested, I sewed the pleat into a dart. I think I'm much happier with how this looks than I would have been with the release pleat. I don't think I would have caught this had I not participated in the sewalong.
  • Fitting doesn't seem like such a horrendous chore when you're not trying to cram a ton of alterations into a single weekend afternoon. 
If you've never participated in a 30-minute-a-day sewalong, here's a quick rundown of what we've done each day. I'm including the "daily point" shot description for each day, which is the picture that we upload to flickr each day so that our "house" can be awarded a progress point in the competition.
  1. Gather materials (fabric, pattern, thread, scissors, etc). Point shot is a picture of your fabric, etc, in a box.
  2. Trace pattern (optional). Cut out pattern and make alterations. Cut your fabric. Note: This one took me considerably longer than 30 minutes, and I didn't even trace my pattern. Point shot: Your cut pattern/fabric pieces.
  3. Stabilize bodice shoulder seams. Point shot is your stabilized seams.
  4. Sew your shoulder seams. Point shot is of the sewn & finished shoulder seams.
  5. Complete and topstitch your neckline (facing or binding). Point shot is of your topstitching setup.
  6. Sew bust pleats (or darts) and hem sleeves. Point shot is your hemmed sleeves.
  7. Baste your bodice seams to check the fit. Point shot is of your iron.
  8. Sew your skirt pleats. Point shot is of your basted pleats.
  9. Sew your pockets and connect the bodice/midriff/skirt sections. Point shot is of your pocket.
  10. Day 10 hasn't been announced yet, but I would assume that it will be to sew up your side seams and hem your dress, which completes the project. I would think/home that the point shot will be of the finished dress, but I guess we will see.
I sewed/basted the skirt pleats last night. I was afraid of the scissor pleat on my backside from the line drawing, but I think it looks fine on the "real world" models that I've seen on flickr. It drapes nicely (in the right fabric) and doesn't appear to add much bulk. My pleated skirt sections:
I might very well try to finish the dress tonight. At the very least, I'll finish either the dress or my second pair of Espressos, and then I'll actually have a finished project to talk about!

Monday, November 18, 2013

Thinking ahead to 2014: Seeking balance

I got a lot of sewing done this weekend, but I don't have any photos yet of anything that I did, so I'm stepping back from project-related posts for the day and want to think out loud about the future for a few minutes.

I feel like I have the attention span of a house cat when it comes to sewing projects. (Ooh! Shiny object! Ooh! Laser pointer! Ooh! Leaves blowing around outside!)  I've gone so far as to plan mini-capsule wardrobes (and bought the corresponding fabrics and patterns), only to throw away all of my plans because I was distracted by a new pattern release. As a result, I have a lot of orphan garments in my closet that can really only be worn with jeans, and I have an overflowing fabric stash, only some of which coordinates with the other pieces in my stash. Almost as bad as my fabric stash is my pattern stash. I've mostly weaned myself off of the JoAnns/Hancock pattern sales for the Big 4, but I'm still a sucker for a newly released indie pattern during the initial discount period that most of them have.

Do other sewists have this problem? (The attention span thing, I mean. I figure that by default, if you're reading a sewing-themed blog, you probably also have a fabric stash problem.)

Next year, my sewing goals are going to revolve around taming my pattern and fabric stash a bit. I won't promise to fast either of these things, but I want to make wiser choices and sew down the stashes that I already have. Instead of only asking myself, "Do I think this has the potential to be cute?", I want to also ask myself, "Will I actually wear this? Like, out of the house, and stuff?"

I generally sew about two garments a month (give or take, depending on garment complexity and what else is going on in my life) and that I also sew for my daughter (frequently) and husband (less frequently), in addition to sewing for myself. Keeping these things in mind, these are a few of the self-designed "challenges" that I'm mulling over to set sewing goals for myself in 2014:
  • HotPattern-a-month challenge: I have a HUGE stash of HotPatterns. I've actually sewn quite a few of them, but between my pregnancy, having a baby, and then moving across 3 states, my backlog of "wanting to sew" HP patterns has grown beyond my comfort zone. Most of their patterns haven't been done to death in the blogosphere, as well.
  • StyleArc-a-month challenge:  My StyleArc backlog isn't as big as my HP backlog (due mainly to exercising more self-restraint because of the shipping charges and/or waiting to place orders in months where I Had to Have the freebie pattern), but their style and wearability scores about the same with me as HP. I've sewn a lot more StyleArcs than I've reviewed because I went through a big StyleArc phase when we were trying to pack up our house and I never got around to doing the pics/reviews.
  • Colette-Pattern-a-month challenge: My Colette stash isn't quite as large as the first two, but I do have a backlog of their patterns that I would really like to sew. HP and Colette both have the advantage of having a few men's patterns, so I can occasionally sew something for my husband and still meet my challenge goals.
  • BurdaStyle challenge:  Sewing folks have been doing this one for as long as I've been sewing--select a pattern from that month's Burda magazine and sew it that month. I no longer subscribe to the magazine, but they make a generous selection of patterns for each issue available on their web site. I like this idea for keeping things "fresh" (instant gratification from downloading PDF patterns), but I worry about finding something that I want to make every month, especially since I'm plus-sized.
  • Pattern Review contest-a-month challenge: The Pattern Review web site typically runs two contests every month. For this, I'd make myself participate in one of those contests every month. The upside to this is that it would stretch me out of my comfort zone. The downside to this is that sometimes I truly have no interest in whatever contests are currently running.
  • Sew-along-a-month challenge (non-company-specific): As you might know, I follow the blogs, etc, of several indie pattern companies. Several of these companies host structured "sew-alongs" with the release of new patterns. The idea behind this would be to find one per month to participate in and go with that. The upside to this is that sewalongs usually break things down into manageable 30-minute-a-day chunks--great for a busy working mom. The downside is that I'll need to actually find a sew-along every month.
As you can probably tell, I'm leaning towards doing the HotPatterns or StyleArc thing as my personal challenge, but I'd love to hear what others think.

Thursday, November 14, 2013

Cake Red Velvet sew-along: Days 1-2

Day 1

We gathered our supplies and posted to the flickr group for our "Daily Point":


You can see that I have two versions planned, both using ITY jersey. The first version will be using that abstract black-and-white cross-hatched jersey purchased from the now-closed Fashionista Fabrics, and the second will be a blue, black, and white striped jersey (the blue is difficult to see in this pic) purchased from the Mill End Store in Portland on our recent trip there.

Day 2


My cat Jasmine helped out with this part.


I did make a few pattern alterations. I'm going with a 3/4 length sleeve on this version, rather than the short sleeve. To lengthen to a 3/4 sleeve, I simply measured on my arm where I wanted the sleeve to hit, then measured my arm circumference at that point. I used a ruler to extend the sleeve portion of the two bodice pieces.

Bodice back:


Bodice front:


Note that on the bodice front, I also did a 3" Deep Bust Alteration, per the Red Velvet DBA tutorial. I opted for this alteration because measuring from my shoulder to where I want my waist seam to be was 3" longer the CF of the bodice pattern piece. This is a great trick for empire/raised waist tops and dresses when the seamline would actually land on your bust.

The one other alteration I did was to shorten the midriff band by 1.5". This is an alteration that I'm carrying over from the Tiramsu, which has a similar sized/shaped midriff band. Additionally, I'm planning to use the inseam pockets from the Tiramisu, rather than the invisible zipper pocket. This is purely do to personal preference--I prefer (and will wear more frequently) anything where I can easily access my cell phone. My Tiramisu gets a LOT of wear, partially for this reason. (That, and I love the print/stripes and get compliments whenever I wear it.) 

In summary, I'm making the following alterations/hacks to my Red Velvet:
  • Lengthen sleeves to 3/4 length
  • 3" DBA
  • Shorten midriff band by 1.5"
  •  Replace invisible zipper pocket with inseam pockets
  • Shorten dress skirt by 2"
  • Bind neckline (rather than use a facing). Per Steph's recommendation, I'll be trimming about 1/2" off the neckline before I bind it.
Anyway, I did get everything altered and cut out last night. Here's my Day 2 "Point"-scoring pic:


 I don't enjoy doing pattern alterations or cutting fabric. I am looking forward to the next few days where I'll actually get to start stitching my dress!

Wednesday, November 13, 2013

Espresso leggings: Drafting via connect-the-dots!

Yesterday was Day 2 of the Cake Patterns 30-minutes-a-day sewalong for the Red Velvet dress pattern. (More on the sewalong in upcoming posts.) Because the sewalong instructions for Day 2 weren't posted until after I had wound things down for the night, I decided to use my "30 minutes" for the day to get started on the Espresso Leggings pattern.


The Espresso leggings are part of the Red Velvet collection, which is a layering wardrobe built around the Red Velvet dress. The leggings are unique in that the pattern provides a template that you use to draft your own custom pattern. The results that I've seen online so far for this pattern have been very impressive.

If you're like me, you might be scratching your head a bit and wondering how complicated or difficult this would be.  I'm happy to report that drafting the leggings is pretty simple:
  1. As instructed, take seven different lower body measurements (a mix of length and circumference) measurements using a tape measure.
  2. Record your measurements on the chart provided in the instructions.
  3. On the pattern drafting grid, find and mark the circles that correspond the intersection of your measurements. (e.g. an ankle circumference of 8" on a 26" inseam, a knee circumference of 14" located 11" below the crotch point, etc.)

    The following photo shows the grid, although the individual measurements are a bit difficult to make out in this pic:

  4. Connect the dots between the filled in circles. Steph provides a crotch curve template for the front and back curves.
  5. Trace off and cut out your finished pattern piece. (Yup, only one piece, since leggings have no side seam):

Here's the pattern piece placed on my test fabric to see the shape better:


Yes, my legs really are that short (I'm 5'2") and yes, my ankles really are that small compared to my thighs and the rest of my legs.
 
I love that these leggings only take one yard of jersey fabric (that's a 60-ish inch wide jersey folded in half in the pic above). There's also only 3 seams + waistband + ankle hems, so I should think that these should sew up in a snap. For the record, it took me 40 minutes to draft, trace, and cut these out, starting from the time that I opened the envelope.

I'll post again and comment on fit, etc, once I get them sewn up.

Monday, November 11, 2013

It's been a while...

So, it's been almost three years since my last post, and I'll keep this short and sweet. In all honesty, I had given up on the idea of blogging. I didn't have enough ideas or enough time to regularly maintain a blog. At the time that I abandoned this blog, I was also working for a major control freak (an understatement) who had made me paranoid that if he detected that I had any sort of life outside of work, it could be held against me.

Since I last posted, I've had a lot of big changes in my life:
  •  A few months after that last post, I changed jobs and moved to a much healthier work environment.
  • In June 2012, I had my daughter Eva. I can't believe that she's 16 months old now. She's absolutely amazing, and I love being her mom.
  • In May 2013, I was canned from my "new" job when the startup company that I worked for laid off 1/3 of its employees, including my whole team. I'm sure that many of you have been through this and know that it's not fun.
  • After going on many interviews and evaluating our options, I accepted an offer with the Large Internet Retailer based in Seattle (the name of my team rhymes with Spindle). As a result, we packed up the family, including our four cats, and moved to Seattle last summer.
Now that I've re-started this blog (again), I have several goals for future posts:
  • In the near term, I am participating in the Cake patterns Red Velvet sewalong. This sewalong runs for the next two weeks, and I'll be blogging my progress here.
  • In the long term, I will post about my sewing projects, patterns, fabric, and such. 
  • For 2014, I am seriously thinking about trying to add some structure to my sewing by coming up with a plan of some sort to push me out of my comfort zone. I have a few ideas for this, which will be a separate post.
  • I reserve the right to occasionally post musings about being a new Seattlite, being a mother of a toddler, and whatever topic strikes my fancy. Trust me, if I allow myself to wander "off topic" a bit, I'll be much more likely to keep this blog regularly updated.
That's all for now!