Friday, February 28, 2014

Friday tapas

We all know that tapas are "small bites". I have several little updates that I wanted to post, but that didn't warrant a whole post to themselves.

Two new HotPatterns!

Okay, I'll admit it. I was stalking the HotPatterns web site this morning. Trudy always releases her new patterns on a Friday, and it had been nearly two months since the last new HotPattern (the Mr. HP Nice & Easy T, which I've already made twice for my husband, so far).  I figured that we were due for a new design or two, and I couldn't be more excited about the new releases, which I want to Sew. Right. Now.

First up is the Weekender Daytona Hoodie:

HP Weekender Daytona Hoodie

Isn't this cute? I had a couple of hoodies like these in the 90's, and I wore the heck out of them. I love the shoulder gathers, too. As I plow through the merino wool jerseys from my FabricMart binges, I will need to set aside a length or two for one of these hoodies.

Also new is one of those high-low hem skirts that we're seeing everywhere right now:

The Deco Vibe Swallowtail Skirt

I was actually looking at a similar pattern to this one from another company, but I'm just going to go with the HotPatterns version--I like it a little better, and I know how HotPatterns fit me.


I think this will look great with boots and one of the many tops that I'll be making from my merino wool jerseys.

Both patterns are 20% off now through the weekend (midnight, EST), too. Yes, I've already ordered both--did you even have to ask?

Sewing Expo in Puyallup

The big sewing expo in Puyallup is happening this weekend. I've never been to a sewing expo before, but this is a big one, and I'm really excited about checking it out. My mom will be in town for a few days starting tomorrow (so no sewing this weekend, probably), and we'll be hitting the expo together on Sunday. If you see two women who are clearly mother and daughter trying to calm down a 20-month-old toddler who is throwing a tantrum because she's had a bolt of fabric taken away from her, feel free to say "hi"!

Plantainification

As I lick my wounds from the likely wadderness of Lekala 4319, I decided that I needed a pick-me-up instant gratification project. I considered the Deer & Doe Plantain free t-shirt download, which I'd already printed out. But, then I had these thoughts:
  1. If I make the Plantain, I'll need to tape together the PDF print out, and cut out the paper pattern.
  2. The Plantain's largest size is 46. I'll likely need to do some grading up and/or FBA'ing.
  3. Can't I just adapt the Plantain details that I like (elbow patches, a-line-ish hem) to my already-beloved SBCC Tonic tee pattern?
 #3 nailed it for me: I am Plantain-ifying my SBCC Tonic tee. I took a look at the pattern pieces from the Plantain and did a guesstimate adaptation to my Tonic tee. You can see the altered side seams/neckline in this photo:


And I love the elbow patches. I think they're adorable. So, I cut out the elbow patch piece from a contrasting fabric and used the Plantain pattern to adapt the patch placement:


I interfaced the elbow patches for stability with tricot interfacing from Fashion Sewing Supply, and used a wide zig-zag patch to attach the patches:


It's taken me about an hour to adapt the pattern, prep, and attach the patches. I am keeping my fingers crossed that I will get a wearable new top out of this experiment.

Wednesday, February 26, 2014

Feeling... meh.

Well, I finished attaching the buttons/front drape on my Lekala tunic...

Yeah, not a good look:

*sad trombone*

I attached the buttons and drape according to the pattern markings, but looking at it on me, I'm realizing something that I should have noticed when I was examining the pattern pieces.

The two big problems that I see are that the buttons aren't placed close enough to the edge of the drape piece. That'll be a pain, but it's an easy enough fix to move the buttons close to the edge. In the tech drawing, they appear to be pretty close to the edge:

Lekala 4319 tech drawing


The more difficult problem to fix will be to re-distribute the ruching in a more flattering manner.

See how the ruching is concentrated through the midsection on the tech drawing? Whereas on me, it all pools at the bottom half? When I saw this, I thought that the ruching placement would be good for camouflaging lumps and bumps.
Now, let's look at the pattern piece for the underlayer:


Lekala 4319 front drape piece
See how the buttons are clustered close together at the bottom, but get further apart as you travel further up the tunic?

Now, look at the drape overlay. The buttons with the biggest "gaps" between them are the mid-section buttons. So we should see the ruching appear as it is in the line drawing, right?

Lekala 4319 drape overlay piece
What I think is happening is that my ginormous bust is taking up some of the length of the ruching, so it's looking like it's all pooling at the lower half. Given that this was a custom-drafted pattern, and my large bust was clearly accounted for in the draft of the underlayer (no riding up, properly positioned bust darts, etc), I'm a little surprised to be encountering it with the drape layer.

To rescue this top, I will clearly need to do some playing around with redistributing the ruching in a more pleasing manner when I move the buttons closer to the edge of the drape. I don't know how my final tweaked version will turn out, but at this point, I'll be happy if I have a comfortable tunic that I can wear under a cardigan or jacket. Given that this was a custom-drafted pattern, I really wasn't expecting so much difficulty with getting it to the point where I thought it was wearable!

I have to be honest, with all of the mis-steps (running out of fabric) and fussiness (the ill-placed ruching on my first attempt at attaching the buttons), I am really ready to be done with this tunic. I also feel like I really need an "easy" project as a palette cleanser, but I'm still trying to decide on my next project.

Here's a picture of my feline supervisor to break up several paragraphs of text.

So what do I think I'll tackle next?

Before this most recent frustration with the button/ruching placement, I had been considering making a blouse as part of the Pattern Review "fitted blouse" contest, starting March 1st. What I like about the format of this contest is that they're dividing it into three skill categories: Beginner, Intermediate, and Advanced. I feel like I'm pretty squarely intermediate in my sewing/fitting skills, so it would be nice to enter a contest with people at a similar skill level. On the other hand, button-down blouses are a fitting nightmare for me, and I don't know that I'm mentally up to that at this point. On the other hand, a "great white blouse" would check off a box on my capsule wardrobe.

I'm thinking that a better choice would be do whip up one or two of my TNT t-shirts in a fun print. I could stash-bust and end up with a guaranteed-wearable top at the same time. And you can't have enough simple knit tops in fun prints, can you? I could also whip up a third Mr. HP t-shirt for my husband (I never blogged the second one, but it's in a soft merino wool jersey and he wears it All The Time), but it's more fun to sew for yourself, right?

On the more practical side of things, my 20-month-old daughter has been going through a growth spurt, and much of her 18M-sized clothing is too short or close to being too short. I really should sew a couple of size 2T outfits for her, but I can't make up my mind on what to sew. Too. Many. Possibilities.

Lastly, I really want to make up the HotPatterns tailored track pant. I have a black ponte earmarked for these, and I don't currently have a pair of casual black pants that fit. So, while not technically part of my capsule wardrobe, these would fill a wardrobe hole and should also be pretty easy to make.

Monday, February 24, 2014

The Lekala 4319 construction post

I very nearly finished my version of my Lekala 4319 tunic this weekend. The tunic itself is fairly easy to construct, but the instructions are so cryptic that they make Burda magazine instructions appear user-friendly.  I've seen a few comments indicating interest in seeing how things go with this pattern, so I am going to dedicate this blog post to documenting my construction process. If you're on the fence about this pattern or come across this post via google because you're looking to make this pattern but want more detailed instructions, hopefully this post will help you.

These instructions/observations are my own, so take these with a grain of salt where needed.

Pattern Overview

Lekala 4319 tunic is a hip-length tunic with a front bodice underlayer and an overlayer that drapes over the underlayer asymmetrically. A row of buttons secures the top layer in place with a ruching effect. The tunic has a cowl-style neckline, long sleeves, and a hem band.


Fabric requirements and recommendations

My tunic required 3 yards of merino wool jersey. Full disclosure/goof: I started cutting my fabric before I realized that I only had 2.5 yards of the fabric that I really wanted to use for this project. By getting really creative with my layout, piecing the front underlayer, and leaving off the bottom hem band, I was able to squeeze this tunic out of 2.5 yards.

If you are making this tunic, you will want to use a very drapey jersey. Consider a rayon, merino wool, or silk jersey. I don't think that most cotton jerseys or ITY jerseys will have enough drape for this pattern and are likely to have too much bulk. Definitely stay away from heavier knits like ponte.

For my own tunic, I am using this red merino wool jersey from FabricMart and these cool-looking metal buttons from Fashion Sewing Supply:

Difficulty level: Advanced Beginner

I think that this pattern would be appropriate for an advanced beginner. You won't be encountering much in the way of difficult construction techniques, and since the pattern is customized for your measurements, you likely won't have too many fitting issues. You will, however, need to figure out your own pattern layout on your fabric and be able to sew a decent knit hem. (I recommend using a twin needle or coverstitch.)

Pattern pieces

This pattern only has 5 pieces, and no facings or bindings:
  • Bodice underlayer (Cut 1x)
  • Bodice over layer/drape (Cut 1x)
  • Bodice back (Cut 2x)
  • Sleeve (Cut 2x)
  • Hem band (Cut 1x)

Time requirements

I spent about 5 hours total on this tunic:
  • ~1 hour to tape the PDF together.
  • ~1 hour to cut the fabric. (Keep in mind that I had to get creative with my layout. If you have enough fabric-- ~3 yards, you should be able to cut this out much faster than I did.)
  • ~ 3 hours to sew the tunic, including a couple of goofs where I had things pinned wrong and had to re-pin before serging.

Construction skills needed

  • Sewing darts
  • Familiarity with knits
  • Hemming knits
  • Marking/sewing buttons

Construction

The following instructions describe how I put my tunic together. Other methods might work better for you, but I'm hoping that these might help if you've already ordered the pattern and are scratching your head at the included PDF instructions.
  1. Mark, pin, and sew the bust darts on the bodice underlayer:
    Mark and pin darts
  2. Hem the neckline on the back piece and on the front underlayer pieces.

    I used the coverstitch function on my Babylock Evolve, but a twin needle hem would work as well:

    Back neckline hemmed


  3. Hem the following edges on the front overlayer/drape piece:
    • Cowl/neckline edge
    • Left shoulder edge
    • Long/curved edge on the garment's left side

      Front drape piece with cowl neckline, left shoulder, left side all hemmed.
  4.  Remove excess calico cat from fabric.

  5. Lay out the front underlayer, right-side up. Place the overlayer/drape on top (right side of under layer to the wrong side of the overlayer). Pin or base along the left shoulder, left armscye, and left side edges.
  6. Stitch/serge the shoulder seams:
    • For the right shoulder, stitch/serge through all three layers (front under and over layers, back piece).
    • For the left shoulder, stitch/serge the front underlayer to the pack piece. The hemmed overlayer will be flapping around loose.

      You can see what the sandwich of layers looks like in the photo below (ignore the seam that looks like a yoke--that was a result of my "creative" fabric layout/piecing):

  7. Set your sleeves in flat:

    • On the left side of the tunic, stitch through all three layers (overlayer, underlayer, sleeve) on the front part of the tunic. Stitch as you normally would (back, sleeve) on the back side of the tunic.
    • On the right side of the tunic, stitch through the front underlayer/sleeve on the front side and the back/sleeve on the back side.

      The left side of the overlayer/drape will still be unattached.

  8. You can now try the tunic on. You can now get a much better idea of what the neckline and drape are going to look like.

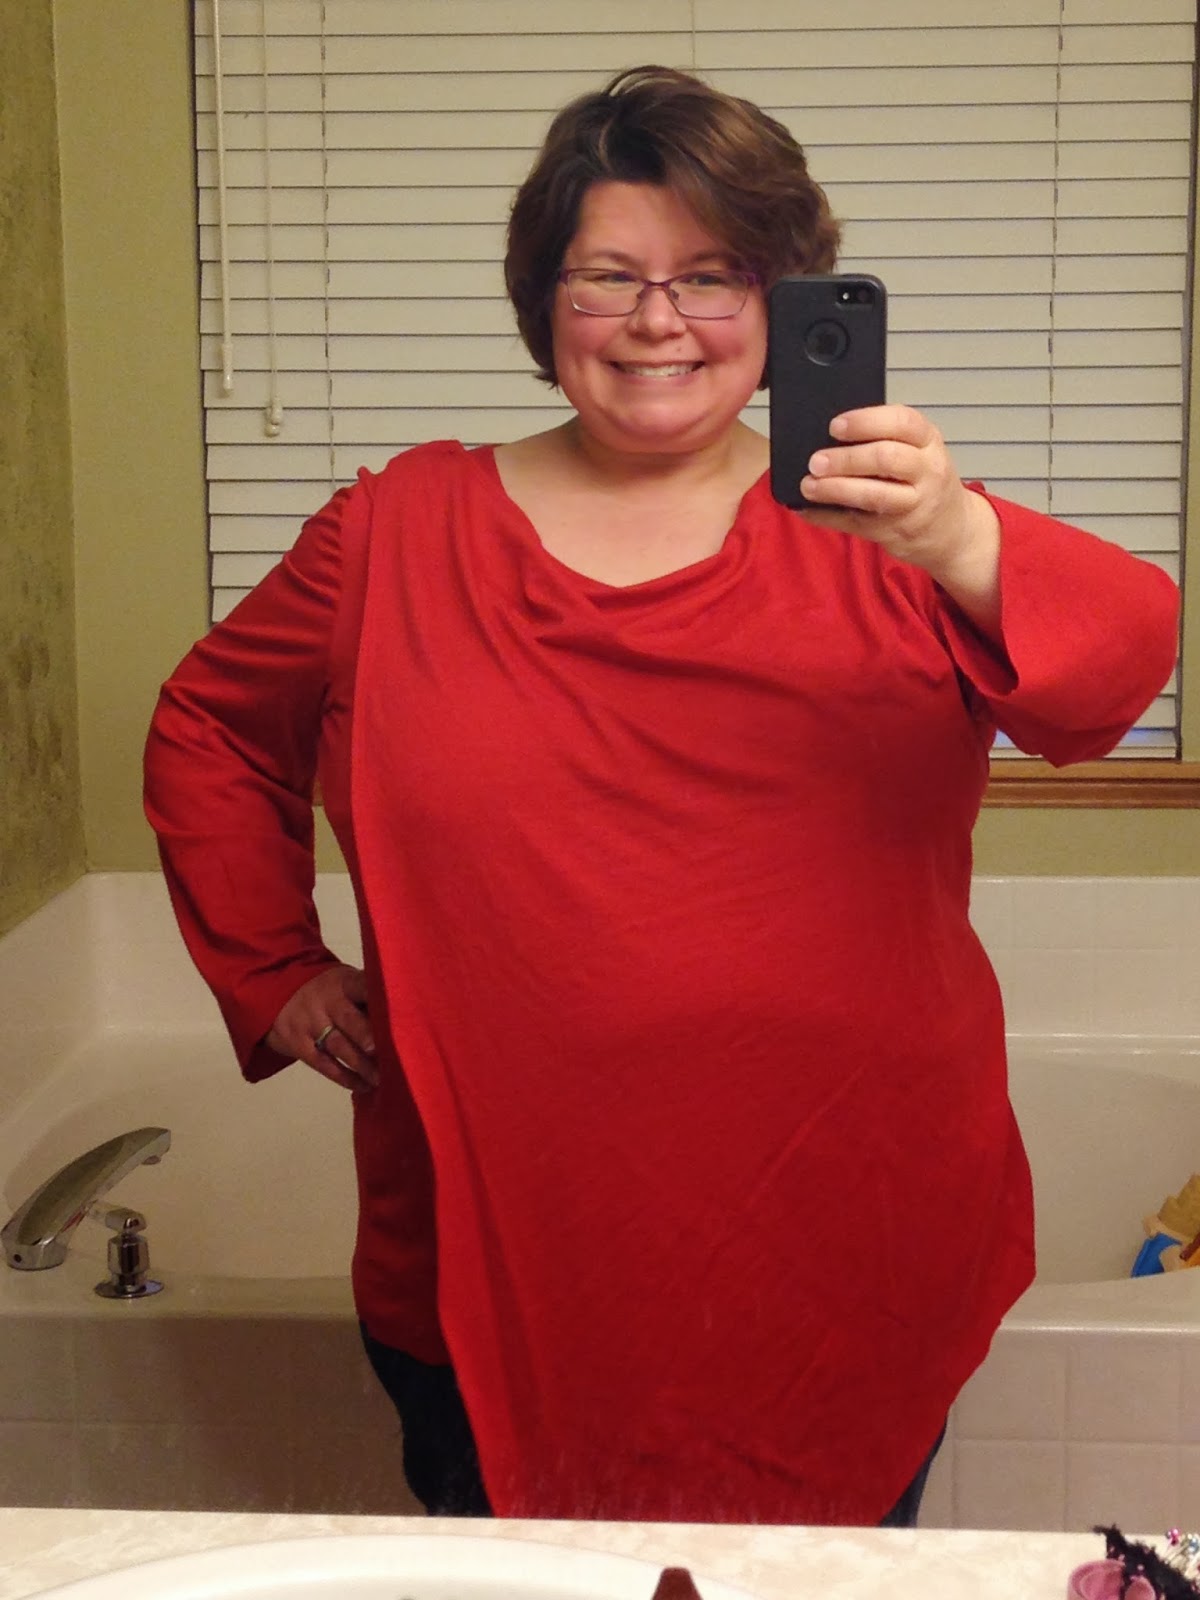
    In this picture, I've pinned the left shoulder drape piece to the underlayer. Apologies for the bathroom mirror selfie:


    Here, I've added a few pins at semi-regular intervals along the left side to get a better idea of what the ruching/drape will look like:

  9. Mark your button placement on both the under and outer layer of the front. I plan to play around with my button placement a little, if needed, to ensure a flattering effect.

  10. Construct/attach the hem band: (Note that I will be omitting this step because of my fabric goof and will simply be doing a coverhem at the bottom hem.)
    • Right sides together, stitch the short edges of the hem band together to form a ring.
    • Fold the ring in half, wrong sides together, so that the raw edges of the band touch.
    • Pin the hem band to the bottom of the tunic. Line up the four layers of raw edges on the front and three layers of raw edges on the back. Stitch/serge to attach.
  11. Hem the sleeves.
That's it, you're done!

Note: I'll update this post with pictures from the final few steps once I've completed those and taken photos.

Wednesday, February 19, 2014

Lekala 4319 progress

I've decided to take a stab at Lekala 4319 as a potential entry into the "New to Me Pattern Contest" on PatternReview.

Lekala 4319 tech drawing
Lekala 4319 is a tunic-length knit top with a ruching detail at the side. The following image shows the vitual model on the Lekala web site:

Computer model version
I have printed out and taped together the PDF pattern and cut my fabric last Sunday. As is generally the case with Lekala patterns, the instructions are a bit sparse and already led to an "oops" with my cutting layout (more on that in a bit). In case anyone else plans to make up this pattern at some point, I'll document the construction here on my blog as I go.

Pattern Prep

Just a few notes about the pattern/PDF itself:
  • The pattern took 44 pages of letter-sized paper to print out.
  • The grid of the PDF layout is 7 x 6 pages with a few blank pages mixed in.
  • The first page of the PDF gives an overview of what the pattern pieces look like on the PDF grid:

To make the massive PDF grid more manageable, I grouped the pages together by pattern piece for taping. The pages are pretty well labeled, as far as what goes next to what, so it was easy to tape all of the bodice overlay pieces together, for example, cut out that piece, then move onto the next piece/grouping. 

One thing that I found interesting that I wasn't sure about for the line drawing is that the bodice has a full underlay piece. My pattern piece is darted, although I'm not sure if that's typical (the line drawing has no darts), or if it was something that the software added because of my massive bust.

Fabric layout and cutting

A few more notes about the fabric layout and cutting your fabric for this pattern:
  • This pattern is a fabric hog, to put it bluntly. I had a 3-yard piece of merino wool jersey that I really wanted to use for this pattern, and I ran out of fabric. I did prewash and likely lost a little length to shrinkage, but to be safe, you'll probably want to have a 3 1/4 yard length piece for this pattern. (Full disclosure: Obviously, I am plus sized, but I am also only 5'2". If you're smaller, you might be able to tease this out of a shorter length of fabric.)

    Correction (24-Feb-2014): I goofed when I originally wrote this bullet point. I found the original sticker from FabricMart, and I had purchased a 2.5 yard length, not a 3-yard length, as I'd originally thought/written. If you have a 3-yard length of fabric, you should be fine for this pattern.
  • To compensate for running out of fabric, I am either eliminating the bottom hem band or will be doing the bottom hem band out of a contrast fabric. I'll try pinning it both ways and see what I think looks better.  I also had to piece the front underlay piece, figuring that the pieced seam won't show, to squeeze everything in.
  • There is a Center Back (CB) seam to this top, although that seam offers no shaping. Because I didn't pay enough attention to the line drawing, I actually cut the back piece on the fold. I am sure that this didn't help my fabric shortage issues. Obviously, because I printed out a pattern with seam allowances, I now have an extra 1.25" at my CB, but I can easily add that CB seam back in with my serger.
I am in the process of finishing up another Mr. HP Nice & Easy T for my husband right now, but as soon as I am finished with that, I will be diving in to the construction of my Lekala tunic.

Monday, February 17, 2014

Finished Project: HotPatterns 2006 - Mr. HP Nice & Easy T's

A couple of months ago, I wrote a post lamenting the lack of available patterns for larger men. I am happy to report that while the Mr. HP Nice & Easy t-shirt pattern from HotPatterns stops at an XXL, it's a roomy XXL, and I only had to do a fairly easy grade-up of ~2 sizes and add a little length in a few places to get a nice, relaxed fit t-shirt for my big-and-tall husband.


To be fair, I've noticed that there seems to be a better variety of current-looking men's patterns now than there was when I started sewing seven years ago. However, the lines with the more current/stylish designs (Thread Theory, Vogue, Burda) stop around the equivalent of a men's XL AND are drafted for a slim, fitted look. Big-and-tall men don't generally want something that clings to a flabby mid-section any more than I do as a plus-sized woman. Thankfully, this is not the case with the Mr. HP t-shirt pattern. Cutting to the chase:

Things that I love about this pattern:
  • Roomy fit through the mid-section. Not every guy is built like Daniel Craig, and the fit of this t-shirt is great for a guy in his mid-30's (like my husband) who has a bit of wear-and-tear on his body.
  • The pattern includes both short and long-sleeved options and a v-neck and crew neck option.
  • The shallow v-neck. I've been trying to steer DH towards more v-necks to update his look in recent years, but he regards the v-neck with suspicion. The v-neck on this t-shirt is shallow enough that he didn't have a problem with it. I finished the shirt on Friday, and he's worn it twice since then.
  • The sleeves are nice and long on the long-sleeved view. I often have to add length to my husband's sleeves, but didn't have to with this pattern.
  • Trudy's instructions for constructing said v-neck. I hadn't seen this method before, but it's easy and produces a really nice "V" (ignore the fabric bubble from over-pressing):

Here's the finished t-shirt (note that it's been graded up two sizes from the XXL). Yes, it's fresh out of the dryer and still wrinkled:


I made this first (test) version using cotton jersey (no lycra, but not an interlock) from fabric.com. The fabric had been marinating in my stash for probably a good four or five years (from the last time that I went on a t-shirt sewing binge for my husband--using a Kwik Sew pattern that time). I like this pattern better than that Kwik Sew; there was something a bit off about the armscye, and we had to fiddle with that a few times to get a comfortable fit. (Other reviewers noted this on PatternReview, as well.) The HP tee fit him comfortably without needing to futz with the armscye.

I am looking forward to updating my husband's t-shirt wardrobe with this pattern. I've already started on a version in a gray, ribbed merino wool (from my FabricMart merino wool-buying binge of a month ago). 

Friday, February 14, 2014

New (to me) pattern contest on PatternReview, StyleArc non-update

Yes, it's another post from me where I pontificate on possible future projects and post pictures of the prospective patterns! 

New (to me) pattern contest

I've been a member of PatternReview for nearly seven years, but I rarely participate in the monthly contests held there. To put it bluntly, the contest winners are usually more popular, thinner, younger, and far more advanced in their fitting and sewing skills than I am. I have a competitive enough nature that I have no interest in entering a contest where I have zero shot at winning. Starting Sunday, however, is a contest that I am actually interested enough in entering that I don't give a rat's ass how many or how few votes I get. That contest is the "New to Me Pattern Contest", which I am entering to challenge myself to step and hold myself accountable.

With me being me, I haven't yet decided which pattern, or even which pattern company, I am going to use for the contest. I've narrowed the field down to three candidate patterns, two of which are Lekala patterns. Here are the candidates:

Lekala 4319

If you read my Basic t-shirt with a flare post a little while back, Lekala 4319 should look familiar to you:

Since my original post where I pointed out this pattern, I have since purchased and printed out the PDF download. I am really dying to see how Lekala's custom measurement system works out for my body type. An interesting note is that although it's not shown in the line drawing, my version of this pattern includes a dart in front. I wonder if that's an omission from the line drawing, or if it was something that the Lekala system generated for me because of my large bust.

Lekala 4321

Pattern candidate is also a Lekala. I have purchased the PDF download for Lekala 4321, as well. I really love the line drawings of both. I think that if I make the body of this top in black and the yoke in a bright color, it will draw attention towards my face and away from my bust/body:

Victory Patterns Lola Dress

The Victory Patterns Lola Dress is a candidate quite simply because I love the idea of a seamed sweatshirt dress. This dress looks super-comfortable and has looked surprisingly good on a wide variety of figures. I love the idea of pairing this with leggings and boots, and the interesting seaming would give me an excuse to play around with some decorative top-stitching on my Babylock Evolve:


The knock against the Lola is that I haven't purchased the pattern yet, and it is quite a bit pricier (~$12 for a PDF download) than the inexpensive Lekalas ($2.50 each/PDF pattern). And the Lola would require more pattern adjusting/fitting work, since I Victory didn't simply generate a custom pattern for me based on my measurements. But...I really love the look of the Lola from the line drawing. Sweatshirt dress.

As a footnote, I was considering the Deer & Doe Plantain t-shirt for this contest, but decided that while I still plan to make up that pattern, it's a little boring for a contest entry.

StyleArc non-update

I'm still trying to decide which two StyleArc patterns to order along with my freebie pattern for the month of February. They did announce a mid-month pattern release for February, but the new patterns are four nice-enough, but not terribly exciting skirt patterns. They're fine, but they're not going to bump anything off of my pattern candidate list or make my decision any easier. I can't say that I've even eliminated any of the patterns from my original list of six; although I think I might be leaning slightly towards going with two patterns for separates (pants + top/blouse or 2 tops/blouses) over the dress pattern, but I might very well change my mind five minutes from now. My decision will very likely come down to the temperature and my mood when I actually place the order. Whichever patterns I don't choose with this order will still be available in a few months when I place my next order, I'm sure.

Wednesday, February 12, 2014

Style(Arc) decisions for February

Like many people on PatternReview, I am enamored with StyleArc patterns, the indie Australian pattern company that offers trendy, RTW-ish designs. Their prices are in line with other indie pattern companies (maybe a little lower), but they lack a US distributor and shipping from AU is a bit pricey. To counter the shipping price pain, they do offer a monthly "freebie" pattern, which you'll receive free with any purchase. I try to plan my limited StyleArc purchases around freebies that I absolutely love, which usually works out to placing 3 or 4 orders per year.

I haven't placed a StyleArc order in nearly six months (when the freebie was the Tootsie Knit top, back in August or September), but I'll be taking the plunge again this month because I really love the February freebie pattern, the Issy Knit Top:


I love the ruching details, the neckline, and it seems like it would be a great pattern match for the insane amount of merino wool jersey that I purchased a little over a month ago.

Fellow US-based StyleArc fans have worked out that to get the most bang-for-your-buck with the AU shipping, you're best off ordering three patterns at a time (including the freebie), so that means that I will actually need to choose two more patterns (from the many StyleArc patterns that I've been eyeing) to fill out my order.

I will probably wait to place my order until the 15th. StyleArc sometimes releases a new pattern or two mid-month, and I want to see what the new offerings are, if any, before making a decision. Assuming that there's no mid-February release or that I don't "have to have" from that batch, here are the patterns that I'm considering, in no particular order:

Trixi Knit Wrap Dress

I love the neckline and inset on the Trixi dress:

I've been seeing similar dresses show up on women around town and the blogosphere, and this is a very curve-friendly style. The Trixi has looked good on everyone who's made it, so that makes this dress a strong candidate.

Jasmine pant

I made the StyleArc Linda pant a while back, but never blogged/reviewed them. The fit is fantastic, but the style (elastic waist) makes them feel like lounge pants, and I made them out of a navy ponte that didn't really go with any tops that I had, so they're an orphan item that gets worn around the house, on dog walks, etc. But given how well they fit, I want to to try another pair of StyleArc pants.

Over the years, as much as I've tried to get myself to wear other styles of pants that I've made, I have found that I won't regularly wear pants that don't have A) a fly front or B) front pockets of some kind. The Jasmine pant has both of these features, is designed for stretch wovens, and has a nice, straight-leg profile. Also, my almost-14-year-old calico cat is named Jasmine, so there's that, too:


Patsy Top

The Patsy Top grabbed my attention because it's looked cute on everyone who has made it, including two plus sized reviewers on Pattern Review. I like that it incorporates the flounce-trend-that-won't-die without looking too fussy. The neckline on this one is nice, too.


BurdaStyle has a blouse with a somewhat similar front flounce/ruffle available for download, , but I think I prefer the Patsy. Here's the BurdaStyle blouse:


Sandra Narrow Leg Jean

I have several of the HotPatterns jeans patterns, but none of them have this style of slim leg profile. And despite being plus sized, cigarette-style pants are actually fairly flattering on me. Even though the Sandra Jean is designed for non-stretch denim, lots of people have been successfully making them up in stretch denim and looking fabulous in them.


I think that these would be fun to make up in a bright color for spring or summer.

Camilla blouse

I think that the Camilla blouse would be a great layering piece and could be made up in a variety of different fabrics. I have a similar blouse from Old Navy, and the fit is a bit off, although I like the style on me. I could fix the fit if I made it myself.

Safari Sam Overshirt

I think I might leave of some of the epaulet details from some versions and omit or do a non-pleated chest pocket, but I am sorely lacking in a good, basic overshirt-style shirt pattern for layering. This is another case where I own a similar shirt from Old Navy (this one actually fits okay), but would like to be able to make my own. The Safari Sam shirt is the closest thing I've seen to my Old Navy shirt:


So, those are the patterns that I'm considering ordering along with the Issy Knit Top freebie. Thoughts? Or for you fellow StyleArc fans, is there a great pattern that I'm missing?

Monday, February 10, 2014

Finished Project: HotPatterns 1157 - Fast & Fabulous Four Seasons Kimono Jacket

I'm back! After a completely hell-tastic past week that included work (pending release), class (presentation and mid-term all due in the same week), and Grid-hawk, I am back to blogging again. Note that unlike in the past when life got too hectic, I did not give up and ignore my blog for a three year stretch this time.

My most recent sewing project was the Fast and Fabulous Four Seasons Kimono Jacket from HotPatterns:


I actually finished this project two weeks ago, but am only now getting a chance to blog about it. While I do think that the finished jacket is as fabulous as advertised, I did not find it particularly fast to construct (maybe I've just been spoiled by sewing too many t-shirts recently). Although, I'd say that as far as jackets go, this one is pretty fast to put together. Some of the details of this jacket (darts, patch pockets) also that this garment isn't going to be whipped together quite as quickly as some of the other entries in HP's Fast & Fabulous line.

For this version, I chose a somewhat boring-looking gray wool knit because I was looking to tick the "gray belted cardigan" entry on my capsule wardrobe list. Remember when fabric.com got in that huge log of Vera Wang fabrics a few years ago? This wool was one of those--it was listed as a "wool jersey" but doesn't have anywhere near the drape that I'd expect a wool jersey to have. It's a nice enough fabric, but I it's been sitting in my stash waiting for the right pattern for the past 5 or so years. Boring as this fabric might seem, I think this jacket would be fabulous in a fun print, due to the lack of seamlines. In fact, when I make it again, I'm thinking of using a houndstooth doubleknit with faux leather trim.

The finished cardigan is a nice, goes-with-anything piece:
HP Kimono Jacket in gray Vera Wang wool knit
And the back:


I didn't notice the wavy hem on this in person or on my dress form. Luckily, with this being wool, I suspect that I'll be able to steam it into a nicer shape, not that a wavy hem would prevent me from wearing it.  The instructions have you do a blind, hand-sewn hem, but I hate hand-sewing with a passion and instead opted to do the hem using the coverstitch mode on my Babylock Evolve.

I made a few other minor design changes, including adding belt carriers (a necessity to keep the belt in a flattering place on my figure) and did a double-row of topstitching using my Evolve's coverstitch to stitch the facings into place:


You can barely see the top-stitching in the photo, but trust me, it's there and it looks nice. Completing this cardigan puts me at 6 yards of stash fabric sewn for the year (3 different pieces) and 24.38 yards of fabric purchased so far this year. Amazingly, I've just crossed the one-month mark since my last fabric purchase. I'm quite proud of myself for that.

I've already gotten started on my next project, which will be a long-sleeved Mr. HP Quick and Easy T for my husband. Over the weekend, I adjusted the pattern based on a RTW t-shirt that he likes and got the fabric cut out. This first version will just be a wearable muslin that I figure he'll just wear around the house, but once I figure out what fit tweaks he needs, I'll make up a few more for him from my recent haul of merino wools.

In non-sewing related news, we got a couple of inches of snow over the weekend. We spent a few hours playing in it on Sunday and had both a sacked out dog and a sacked out toddler by the end of the day. I shall leave you with a video of Arya playing with a snowball: